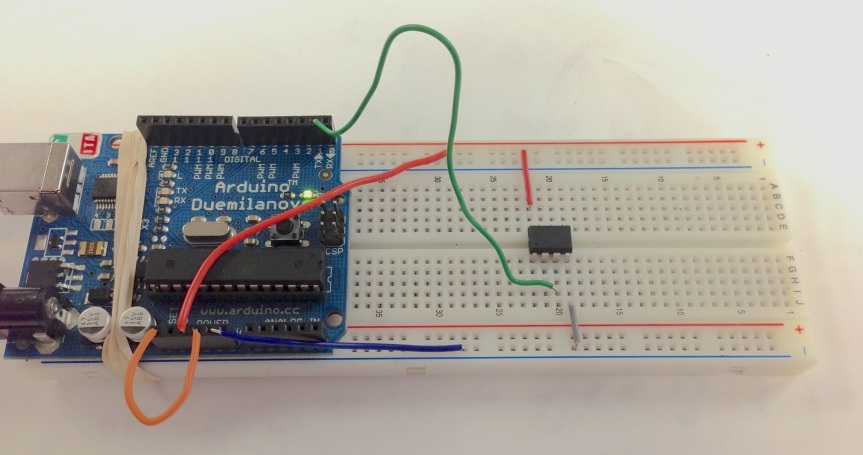
One of the first things I wanted to work on after figuring out how to program the ATtiny85 was to get serial communication working. Turns out this is incredibly simple. You just have to use the standard software serial library and define the rx and tx pins.
To use Software Serial you must have set the internal oscillator to 8MHz. I have only tested this at 9600 baud rate but it has worked perfectly so far. I imagine that you could use 19,200 or 38400 baud if you used the external 20MHz crystal oscillator.
Once you’ve programmed the ATtiny, you’ll need a way to talk to it. You can use an ftdi chip or an ftdi cord but my preferred method is to use the ftdi chip in the arduino (since I’m cheap and already have an Arduino out). To do this, you’ll just connect the rx and tx pins of the Attiny to the rx and tx pins of the arduino (reverse them tx to tx and rx to rx) and connect the arduino to your computer with the usb cable. The final thing you need to do is short the reset by plugging in a wire between the reset and ground pins.
You may run into problems if you leave the rx and tx pins connected between the arduino and ATtiny while you are programming the ATtiny. If this occurs, just unplug the wires and plug them back in after you’ve programmed. Below is the very simple source code and an image of my setup.
#include <SoftwareSerial.h>

SoftwareSerial mySerial(3,4);  //rx, tx

void setup()
{
    mySerial.begin(9600);
}

void loop()
{
    mySerial.println("hello world");
    delay(1000);
}


Does not work! Please help!
In what way does it not work?