
One of the most popular posts on my blog is this post about using rotary encoders on the attiny85. Unfortunately that post is mostly things I tried that didn’t work. A few months after writing that post I realized why it didn’t work and posted about that. And finally, I’ve figured out the solution, which you can see below.
If you haven’t read the previous post, you can read it here to get an idea about what not to do. The problem last time was that a rotary encoder needs two interrupt pins but the ATtiny85 only has one external interrupt pin. You can get by just checking each pin in the loop but if you do that you can’t really do much else in the loop or you’ll miss something. Here is where Pin Change Interrupts come in. I’d also recommend you look at this post I wrote yesterday about using Pin Change Interrupts on the ATtiny85. It will explain most of the theory behind what happens below.
The other thing you will want to read is this Bildr post about quadrature encoders. My ISR function is directly stolen borrowed from this site just because it’s pretty well written and why reinvent the wheel?
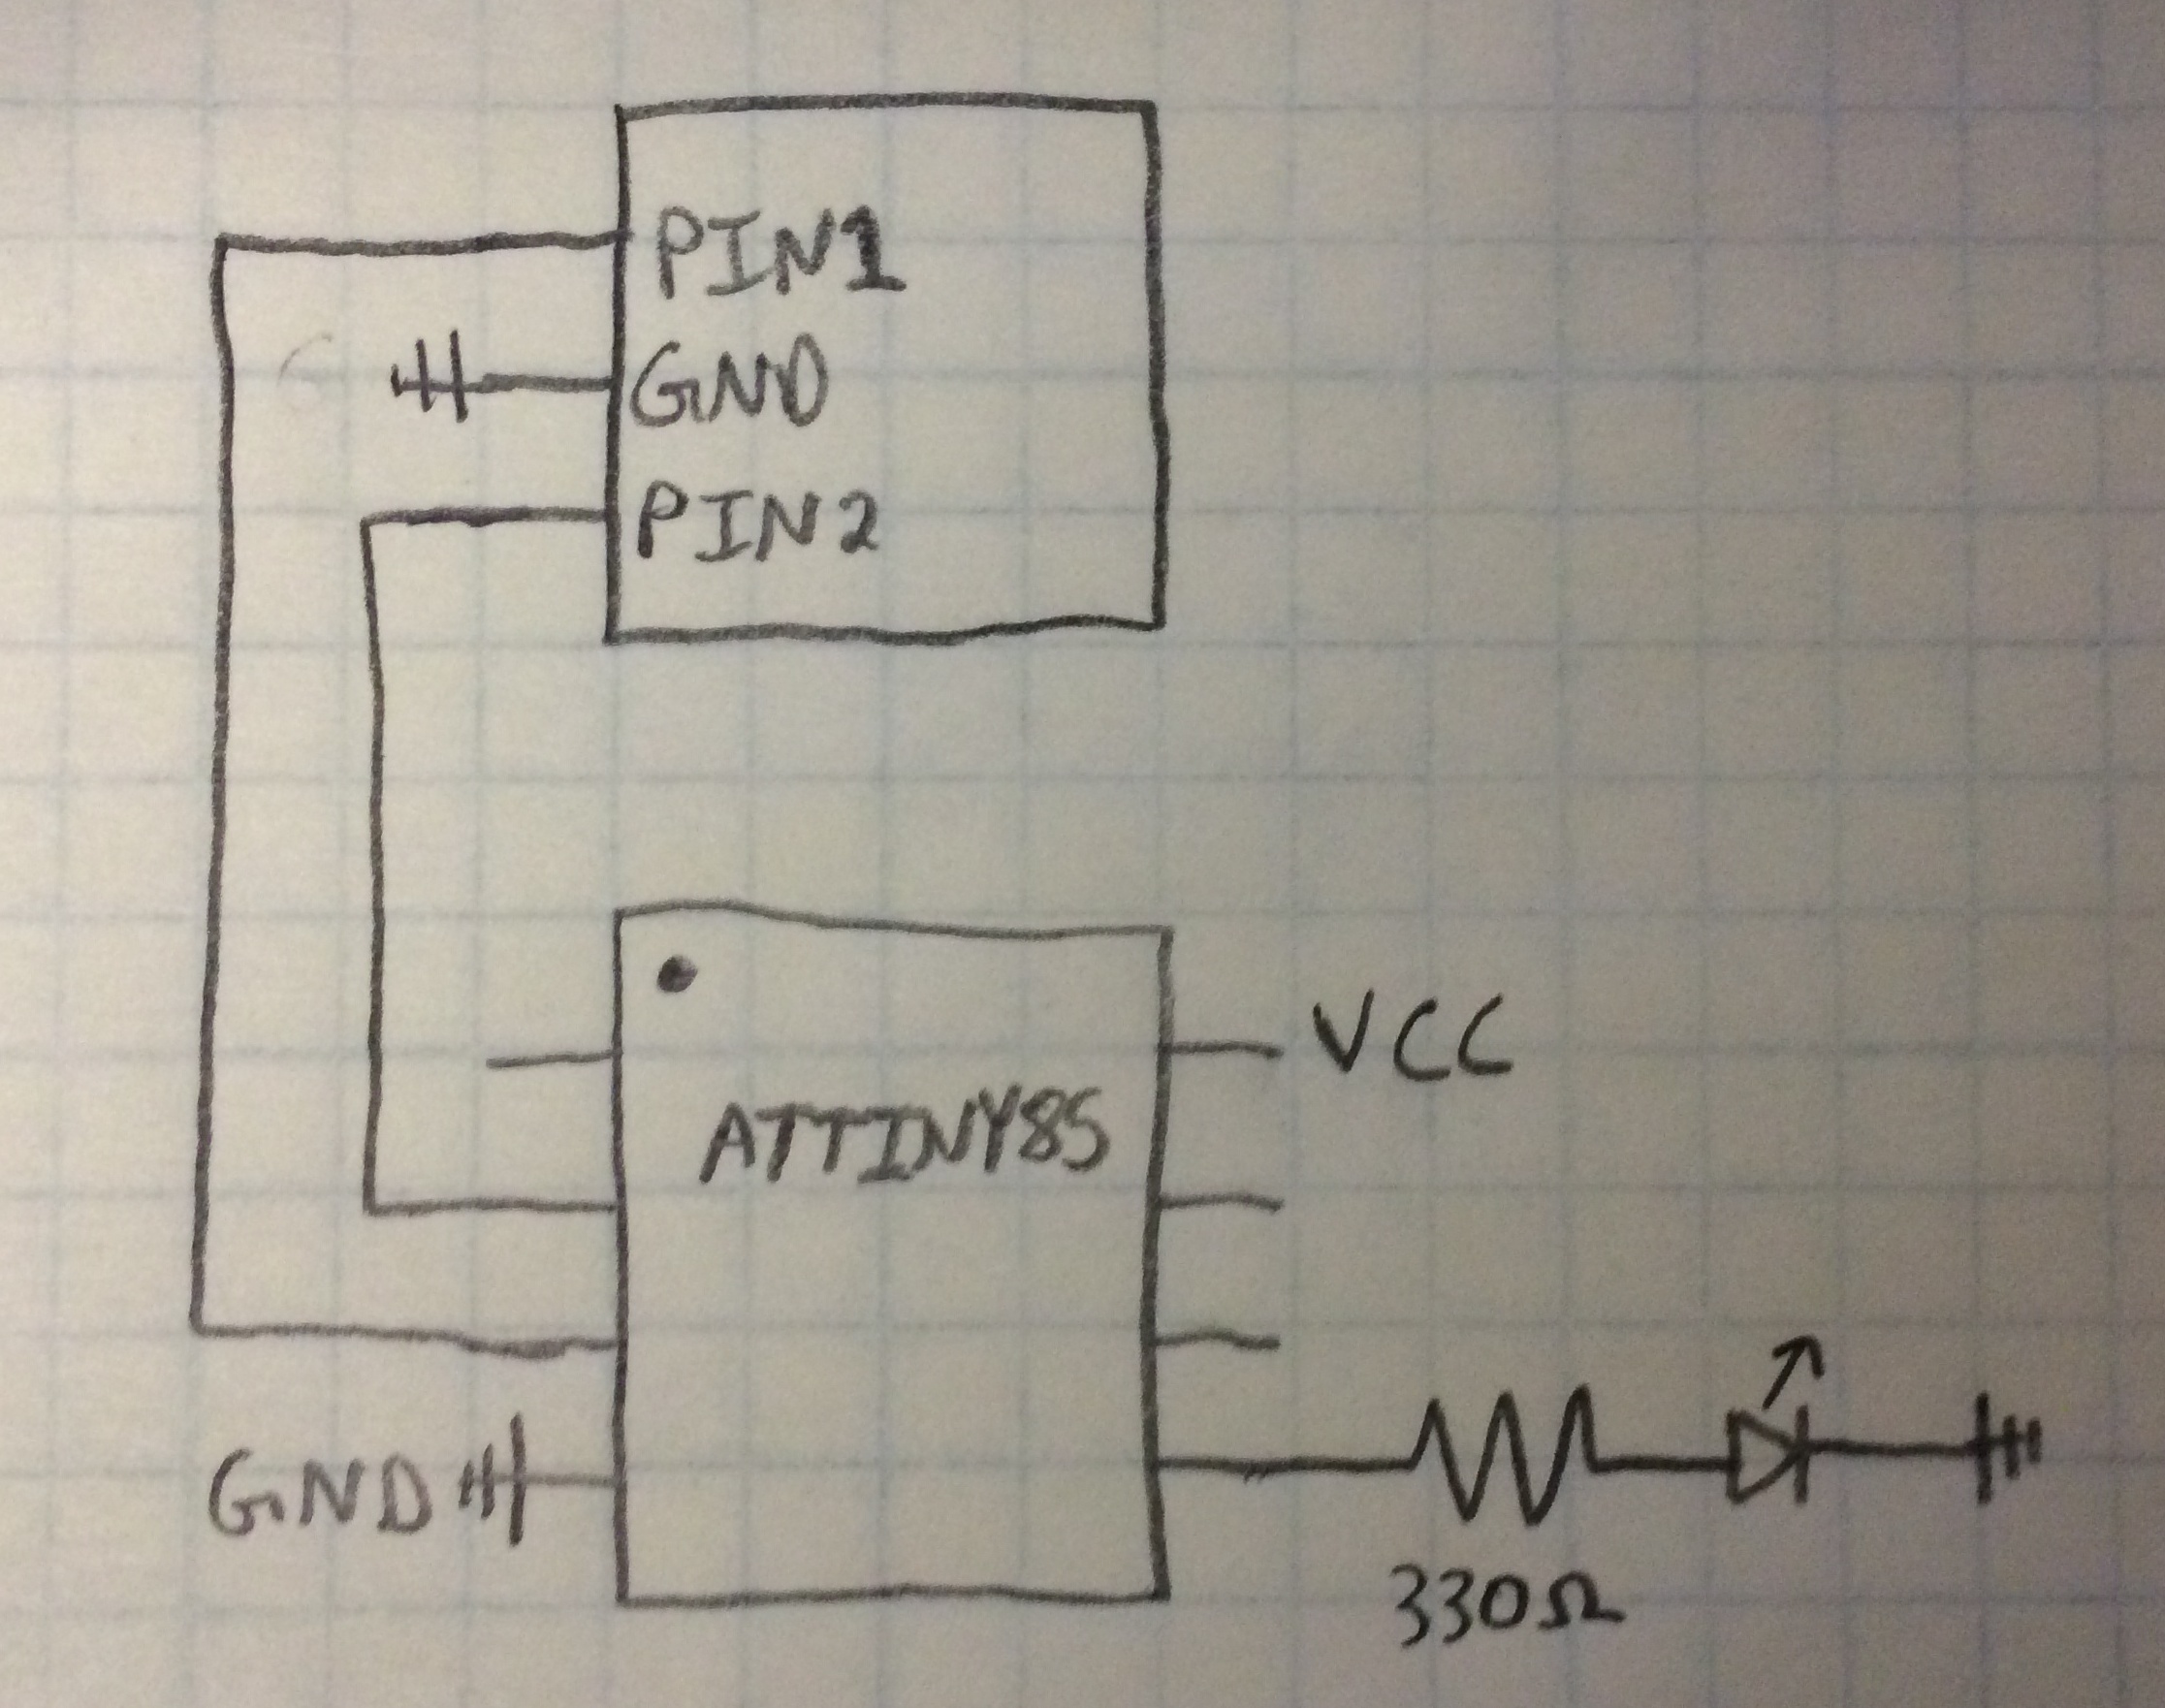
Below is a picture and diagram of my setup which involves just a LED, a rotary encoder, and an ATtiny. As you turn the encoder, it makes the LED lighter or darker. I’m not showing the stuff involved with programming the ATtiny in order to keep it cleaner, but you can find that info here.

And here is the code:
#include "avr/interrupt.h";

volatile int value = 122;
volatile int lastEncoded = 0;

void setup()
{
  pinMode(0, OUTPUT);  // set LED pin to output

  // set pins 3 and 4 to input
  // and enable pullup resisters
  pinMode(3, INPUT);
  pinMode(4, INPUT);
  digitalWrite(3, HIGH);
  digitalWrite(4, HIGH);

  GIMSK = 0b00100000;       // Enable pin change interrupts
  PCMSK = 0b00011000;       // Enable pin change interrupt for PB3 and PB4
  sei();                    // Turn on interrupts
}

void loop()
{
  analogWrite(0, value);
}

// This is the ISR that is called on each interrupt
// Taken from http://bildr.org/2012/08/rotary-encoder-arduino/
ISR(PCINT0_vect)
{
  int MSB = digitalRead(3); //MSB = most significant bit
  int LSB = digitalRead(4); //LSB = least significant bit

  int encoded = (MSB << 1) |LSB; //converting the 2 pin value to single number
  int sum  = (lastEncoded << 2) | encoded; //adding it to the previous encoded value

  if(sum == 0b1101 || sum == 0b0100 || sum == 0b0010 || sum == 0b1011)
    value++;
  if(sum == 0b1110 || sum == 0b0111 || sum == 0b0001 || sum == 0b1000)
    value--;

  lastEncoded = encoded; //store this value for next time

  if (value <= 0)
    value = 0;
  if (value >= 255)
    value = 255;
}
And here is a nice little diagram of the two encoder signals:


Hi!
Thanks for the code! It works with the Attiny 45 too. There’s is some formatting errors in the code though, some ‘s and =’s has turned into “&” and “lt;”
Regards Patrik
I used ATTINY85 to control 2 MOSFETs w/ rotary encoder to change another IC’s volume levels by replacing toggle buttons w/ MOSFETs. I just enabled interrupts only one PIN and it was enough. Here’s my code if someone needs
http://pastebin.com/GH1Y012S
Thank you for this good explanation, I had no experience on arduino or attiny before and with your help I just made it. Thank you so much!
Fatih,
Question, not a criticism. Is
if (value = 255)
value = 255;
better code than:
value=constrain(value, 0, 255);
Better is so hard to define. In the grand scheme of things, it doesn’t really make a difference and you should just do whatever you want. I like the first version better because I think it’s more clear. Anybody who knows how to program can look at that and instantly know how it works. They don’t have to be familiar with constrain. And if something changes, you know the first version will keep working but the second one won’t. So just from a clarity point of view, I think it’s better. But it is longer, so there’s that. Just a preference thing. As far as speed and efficiency go, I think the first version is slightly faster because it doesn’t require calling a function and passing variables and returning variables. Once in the function, it’s almost the same as the if statement above. You just have the extra overhead of calling the function, returning a value even if it wasn’t necessary, etc. Anyway, not a big difference either way.