
The Nokia 5110 LCD screen is a nice little LCD sold by both Sparkfun and Adafruit. I needed to work with one for my wireless weather station and wanted to use my logo instead of the Adafruit logo which comes in their library. So I wrote a processing program to make creating images easier.


The screen is monocromatic and is 84 x 48 pixels. I’m using the Adafruit library, which is very good and can be found here. While that library is great, the Sparkfun site has better hookup diagrams here. I will note that dispite what Sparkfun says, if you’re using the Adafruit library, you can hook the pins of the LCD up to any pins of an Arduino, not just the ones Sparkfun says. The only problem was that I had to reverse two of the pins in the sketch: pins 3 and 4 representing the RST and CS. I should note that while this is a 3.3V LCD, I’ve had no problems operating it on 5V, though that is without the backlight and it will probably reduce the LCD’s lifetime.
Original Code:
// pin 3 - Serial clock out (SCLK)
// pin 4 - Serial data out (DIN)
// pin 5 - Data/Command select (D/C)
// pin 4 - LCD chip select (CS)
// pin 3 - LCD reset (RST)
Adafruit_PCD8544 display = Adafruit_PCD8544(7, 6, 5, 4, 3);
Working Code:
// pin A4 - Serial clock out (SCLK)
// pin A3 - Serial data out (DIN)
// pin A2 - Data/Command select (D/C)
// pin A1 - LCD reset (RST)
// pin A0 - LCD chip select (CS)
Adafruit_PCD8544 display = Adafruit_PCD8544(A4, A3, A2, A0, A1);
After that it worked great and I knew that images could be programed using hex code to represent each pixel. A 1 means on and a 0 means off. I originally thought that if you were going to represent the pixels, you would start at one corner and go along the row until you reached the end. Then go back to the starting side, go down a line and continue. Maybe it would start by going down instead of over but the thought was the same. As it turns out this, is completely wrong.
This library starts in the top left corner. The first byte is the first eight pixels going down. Then it jumps back up to the top row in the next column and the next byte is the next eight pixels going down. It’s important to note that the top bit is the least significant bit, meaning it’s on the right side. So this image below would have a binary representation of { 11110001, 00011111 } and a hex representation of: { 0xF1, 0x1F }.

Once you understand this, it’s simple to write a program that converts a set of pixels into the correct hexadecimal code. Then I wrote a program that allows you to draw the pixels in the first place. The code is written in Processing just because it’s so easy to work with. The program can be found here and the code is at the bottom of this page after the examples. The code is very heavily commented so it should be very easy to follow along.
Code available here: Nokia_LCD_Bitmap.pde
Running the program, you’ll see a grid of 84×48 pixels. If you hold down the left mouse button as you move over the pixels they’ll change to black. If you hold the right mouse button, they’ll change back to white. Clicking the save button outputs a text file of the hex code to the same folder as the sketch being run. The other buttons offer other things that might be nice like flipping the image horizontally or vertically or moving up, down, left, or right.
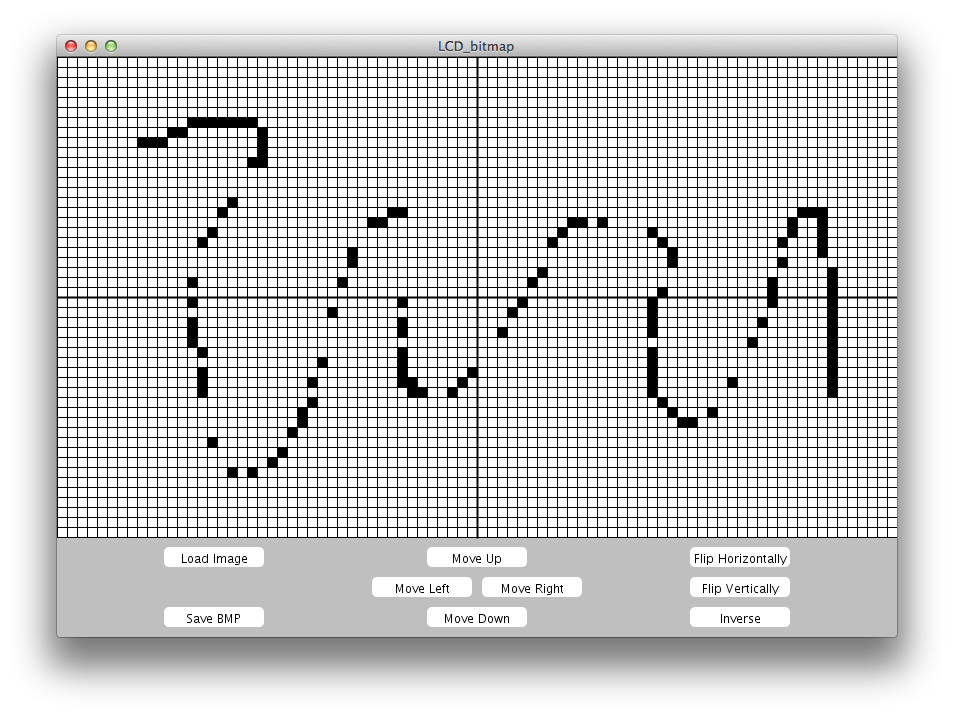
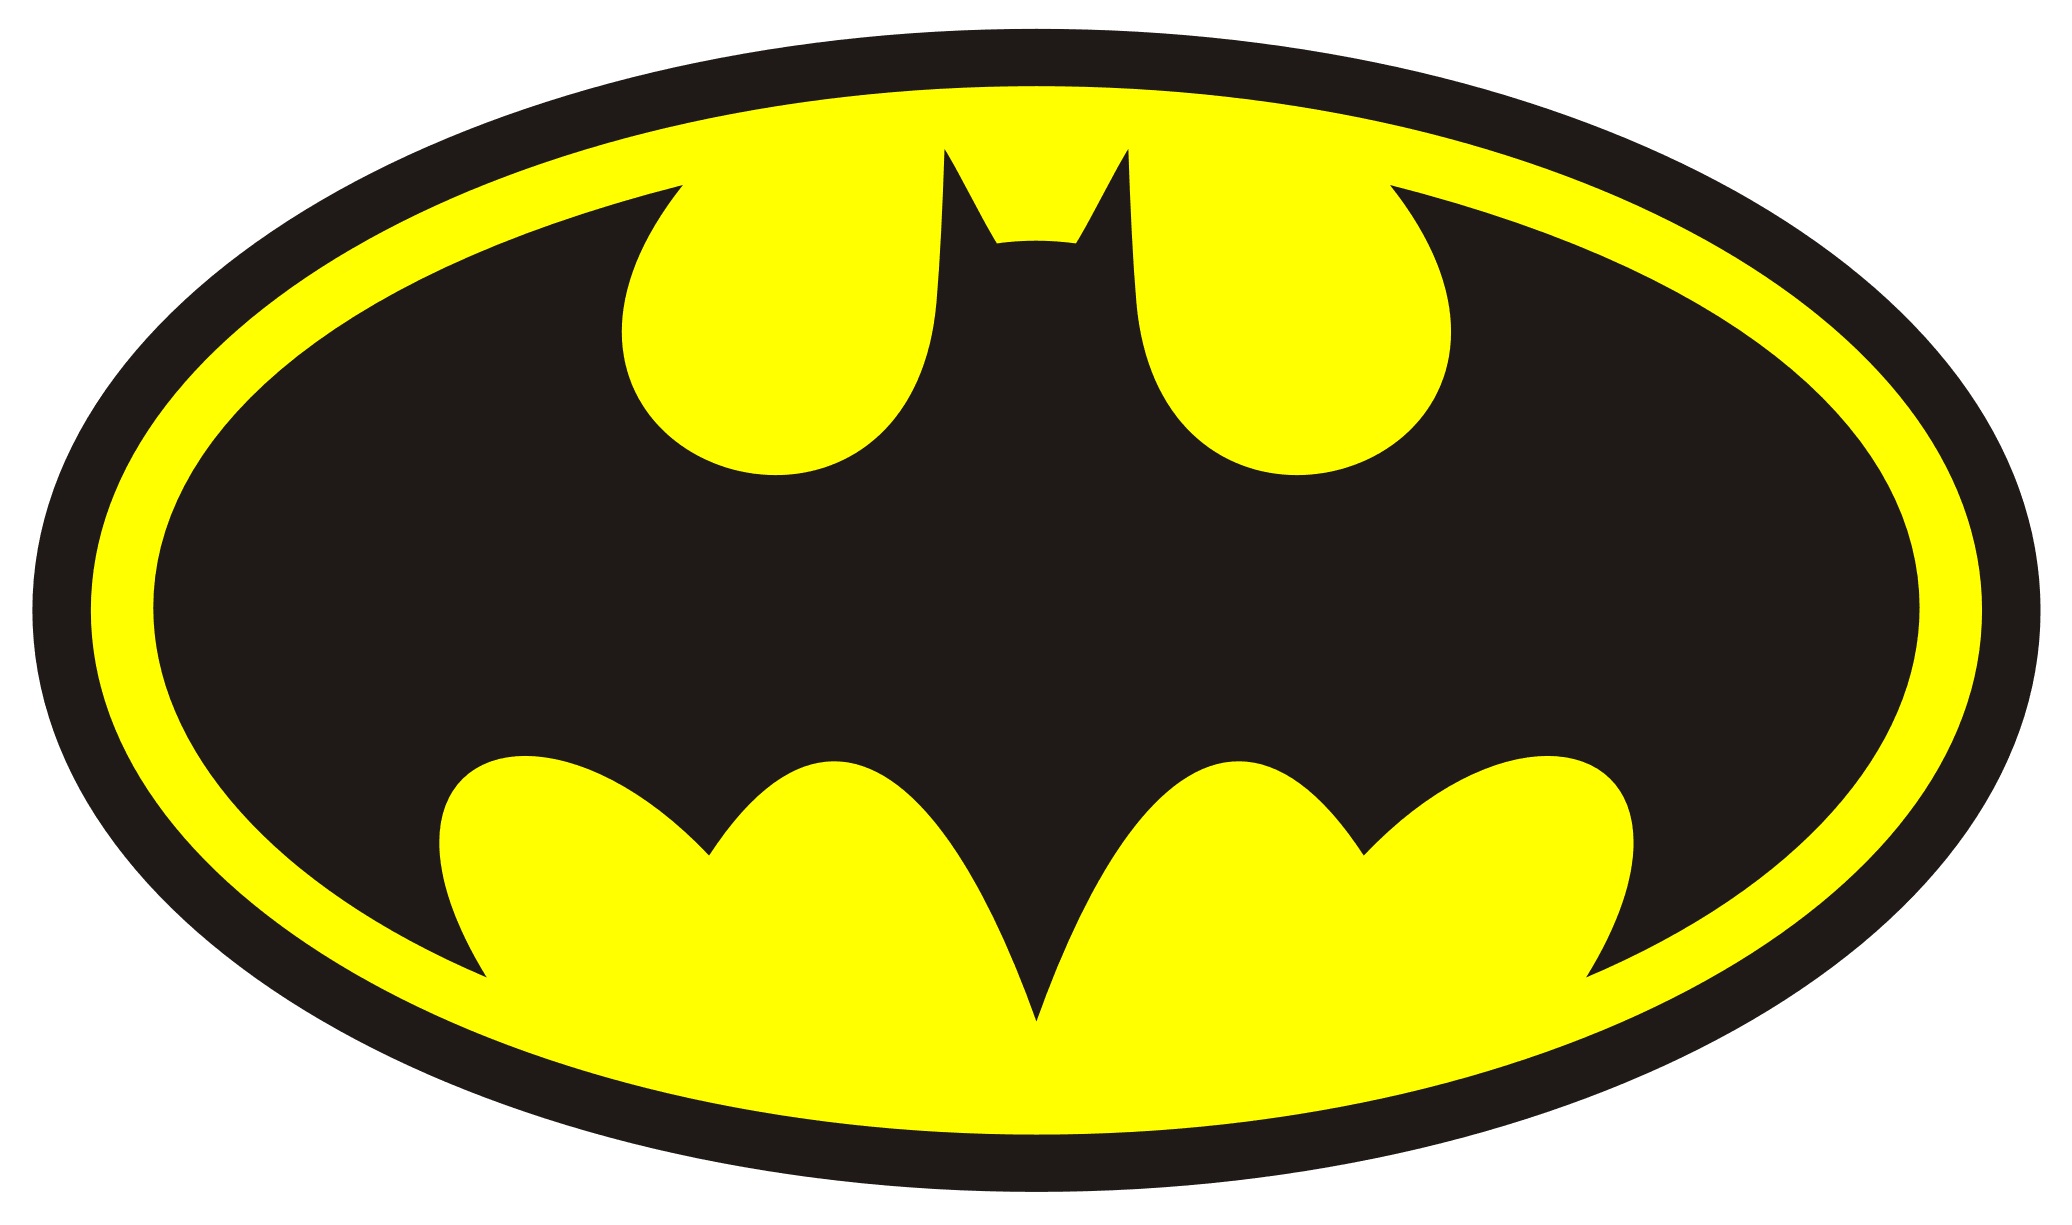
Finally, there’s a button to load an image. This pulls in an image from the sketch folder called “image.jpg”. It resizes it to fit on the screen and then converts it to pixels. It does this by converting to greyscale and finding the average brightness value of the pixels. Then it searches through every pixel and if it’s brighter than average, it becomes white; if darker, it becomes black. Finally, it uses these colors to change the color of the appropriate squares in the program. Then, it can be manipulated as above. This is useful since it sometimes requires some tuning. It uses a series of images to show the user the steps of this process. This isn’t necessary and can be removed from the code but I like seeing the process and figured others might too. The gif below shows this process for the batman logo.

Below are some tests images and their results. Overall, I’m pretty happy even if a few of the images do need a little retouching. If you use this to make something cool, share it in the comments!


![]()


![]()


![]()
The code is available below. Click to expand. Or you can download it from above.
// Written by Matthew Walker  -  mwwalk@gmail.com

/* This program creates a screen 84 x 48 pixels wide that the user can color (b&w)
 by holding the left mouse button and dragging it over pixels.  You can delete the
 color by holding the right mouse button.

 Click the save button to have the text file saved to the sketch folder.

 Click the load image button to load a jpg named "image.jpg" from the sketch folder.
 It will convert the photo to 84x48 pixels and show images from the process.

 The other buttons move the pixels around in ways that might be helpful.
 Note that moving pixels at the edges is destructive, so if you move your pixel
 off the screen, it will stop existing.

 This program is released under the don't be a douchbag liscense.  You are
 free to do whatever you want with this, but please give me credit if you can.
 Remember, Karma's a bitch.
 */

PrintWriter output;    // file output
PFont myFont;          // Helvetica font

// Image files - Only the first two are necessary,
//  the rest could be deleted if you don't want to see process
PImage img;
PImage img2;
PImage img3;
PImage img4;
PImage img5;
PImage img6;

int pixelSize = 10;            // Size of the squares on screen
int x = 84;                    // Pixels in X direction
int y = 48;                    // Pixels in Y direction
int imageNum = 0;              // This is used for showing image process
float averagePixelValue = 0;   // Average pixel brightness

// These are the squares that make up the actual pixels
// Using custom Square class shown below
Square boxes[][];
Square temp[][];

// Create buttons using custom Button class shown below (x,y,width,height, label)
Button saveButton = new Button(107, 550, 100, 20, "Save BMP");
Button imageButton = new Button(107, 490, 100, 20, "Load Image");
Button inverseButton = new Button(633, 550, 100, 20, "Inverse");
Button flipHor = new Button(633, 490, 100, 20, "Flip Horizontally");
Button flipVert = new Button(633, 520, 100, 20, "Flip Vertically");
Button moveLeft = new Button(315, 520, 100, 20, "Move Left");
Button moveDown = new Button(370, 550, 100, 20, "Move Down");
Button moveUp = new Button(370, 490, 100, 20, "Move Up");
Button moveRight = new Button(425, 520, 100, 20, "Move Right");

void setup()
{
  size(840, 580);
  myFont = createFont("Helvetica", 12);

  boxes = new Square[x][y];
  temp = new Square[x][y];

  // Go through and gives Squares location, size, and white color
  for (int i=0; i<x; i++)
  {
    for (int j=0; j<y; j++)
    {
      boxes[i][j] = new Square(i*pixelSize, j*pixelSize, pixelSize, pixelSize);
      temp[i][j] = new Square(i*pixelSize, j*pixelSize, pixelSize, pixelSize);
      boxes[i][j].myColor = color(255);
    }
  }
}

void draw()
{
  background(191);    // Set background to a nice gray

  // Determine if each pixel is being clicked and color correctly.
  // Uses the isOn() function of each square the returns true if mouse is over it
  // This isn't the most effecient way to do it, but allows for easier changes in
  //  the future to change pixel size and number
  // If left mouse is down, pixel is colored
  // If right mouse is down, pixel is colored (control-click on mac)
  for (int i=0; i<x; i++)
  {
    for (int j=0; j<y; j++)
    {
      if (mouseButton == LEFT)
        if (boxes[i][j].isOn())
          boxes[i][j].myColor = color(0);
      if (mouseButton == RIGHT)
        if (boxes[i][j].isOn())
          boxes[i][j].myColor = color(255);

      // Draws each square using the draw function of that object
      boxes[i][j].draw();
    }
  }

  // Draws the middle lines
  stroke(0);
  strokeWeight(2);
  line((x/2)*pixelSize, 0, (x/2)*pixelSize, y*pixelSize);
  line(0, (y/2)*pixelSize, x*pixelSize, (y/2)*pixelSize);

  // Draws Buttons
  saveButton.draw();
  flipVert.draw();
  flipHor.draw();
  moveLeft.draw();
  moveRight.draw();
  moveUp.draw();
  moveDown.draw();
  imageButton.draw();
  inverseButton.draw();

  // This is used to show the images from processing
  // Could be deleted if not wanted
  if (imageNum > 0)
    delay(1000);
  if (imageNum == 1)
  {
    image(img, 0, 0);
    imageNum = 2;
  }
  else if (imageNum == 2)
  {
    image(img2, 0, 0);
    imageNum = 3;
  }
  else if (imageNum == 3)
  {
    image(img3, 0, 0);
    imageNum = 4;
  }
  else if (imageNum == 4)
  {
    image(img4, 0, 0);
    imageNum = 5;
  }
  else if (imageNum == 5)
  {
    image(img5, 0, 0);
    imageNum = 0;
  }

}

void mousePressed()
{
  // Save the picture
  if (saveButton.isClicked())
    savePicture();

  // Process image from sketch folder
  if (imageButton.isClicked())
    processImage();

  // Invert the pixels
  if(inverseButton.isClicked())
  {
    for (int i=0; i<x; i++)
    {
      for (int j=0; j<y; j++)
      {
        if(boxes[i][j].myColor == color(0))
          boxes[i][j].myColor = color(255);
        else
          boxes[i][j].myColor = color(0);
      }
    }
  }

  // Flip pixels horizontally (Around vertical line of symetry)
  // Uses temp sqaures for this, which is easier but not optimal
  if (flipHor.isClicked())
  {
    // Copy colors to temp Squares
    for (int i=0; i<x; i++)
      for (int j=0; j<y; j++)
        temp[i][j].myColor = boxes[x-1-i][j].myColor;

    // Move temp colors back to real Squares
    for (int i=0; i<x; i++)
      for (int j=0; j<y; j++)
        boxes[i][j].myColor = temp[i][j].myColor;
  }

  // Flip pixels vertically (Around horizontal line of symetry)
  // Uses temp sqaures for this, which is easier but not optimal
  if (flipVert.isClicked())
  {
    // Copy colors to temp Squares
    for (int i=0; i<x; i++)
      for (int j=0; j<y; j++)
        temp[i][j].myColor = boxes[i][y-1-j].myColor;

    // Move temp colors back to real Squares
    for (int i=0; i<x; i++)
      for (int j=0; j<y; j++)
        boxes[i][j].myColor = temp[i][j].myColor;
  }

  // The next four functions move the pixels around the screen destructively
  if (moveLeft.isClicked())
  {
    for (int j=0; j<y; j++)
    {
      for (int i=0; i<x-1; i++)
      {
        boxes[i][j].myColor = boxes[i+1][j].myColor;
      }
      boxes[x-1][j].myColor = color(255);
    }
  }

  if (moveRight.isClicked())
  {
    for (int j=0; j<y; j++)
    {
      for (int i=x-1; i>0; i--)
        boxes[i][j].myColor = boxes[i-1][j].myColor;

      boxes[0][j].myColor = color(255);
    }
  }

  if (moveUp.isClicked())
  {
    for (int i=0; i<x; i++)
    {
      for (int j=0; j<y-1; j++)
        boxes[i][j].myColor = boxes[i][j+1].myColor;

      boxes[i][y-1].myColor = color(255);
    }
  }

  if (moveDown.isClicked())
  {
    for (int i=0; i<x; i++)
    {
      for (int j=y-1; j>0; j--)
        boxes[i][j].myColor = boxes[i][j-1].myColor;

      boxes[i][0].myColor = color(255);
    }
  }
}

// Processes image to get pixels from it
// Also generates images to be shown that will
//  show the process of converting image
// Those images aren't necesary but I like them
void processImage()
{
  // Loads image from file
  img = loadImage("bman.jpg");

  // If it couldn't load image, exit function so that
  //  there won't be a null pointer exception later,
  //  but the program won't exit and delete your work.
  if (img == null)
    return;

  // Resizes to fit in window depending on if the
  //  image is constrained in the x or y direction
  img2 = img.get();
  if (img2.width / 84. > img2.height / 48.)
    img2.resize(840, 0);
  else
    img2.resize(0, 480);

  // Create another image and fill with white
  img3 = createImage(840, 480, RGB);
  img3.loadPixels();
  for (int i=0; i<840; i++)
  {
    for (int j=0; j < 480; j++)
    {
      img3.pixels[i+840*j] = color(255);
    }
  }

  // Copies original image to new image with white as background
  img2.loadPixels();
  for (int i=0; i<img2.width; i++)
  {
    for (int j=0; j < img2.height; j++)
    {
      img3.pixels[i+840*j] = img2.pixels[i+img2.width*j];
    }
  }
  img3.updatePixels();

  // Makes it gray
  img4 = img3.get();
  img4.filter(GRAY);

  // Resizes to 84x48 and gets average brightness
  img5 = img4.get();
  img5.resize(84, 48);
  img5.loadPixels();
  averagePixelValue = 0;
  for (int i=0; i<84; i++)
  {
    for (int j=0; j<48; j++)
    {
      averagePixelValue += brightness(img5.pixels[i+84*j]);
    }
  }
  averagePixelValue /= (84*48);

  // Go through array and convert to b&w
  // If pixel brightness is more than average, make it white
  // Otherwise, make it black
  for (int i=0; i<img5.pixels.length; i++)
  {
    if (brightness(img5.pixels[i]) >= averagePixelValue)
      img5.pixels[i] = color(255);
    else
      img5.pixels[i] = color(0);
  }
  img5.updatePixels();

  // Color boxes based on the above so that they can be further manipulated
  for (int i=0; i<84; i++)
  {
    for (int j=0; j<48; j++)
    {
      boxes[i][j].myColor = color(brightness(img5.pixels[i+84*j]));
    }
  }

  img5.resize(840, 480);  // resize for better display

  // Change imageNum so that it will display the process
  imageNum = 1;
}

void savePicture()
{
  // Output filename
  output = createWriter("bmp.txt");

  // Helpful information at beginning of file
  output.println("If you want to replace the buffer in the Adafruit_PCD8544.cpp file, use this beginning: ");
  output.println("uint8_t pcd8544_buffer[504]");
  output.println("");
  output.println("If you want to put the use the image as a graphic at more than just the splash screen, use this beginning: ");
  output.println("static unsigned char PROGMEM yourNameHere[]");

  output.println();
  output.println("So it would like like this: ");
  output.println("uint8_t pcd8544_buffer[504] = { Lots of Hex numbers seperated by commas };");
  output.println("");

  output.println("Your numbers are below: ");
  output.println();
  output.print("= {");

  // Go through every pixel by starting at top left corner and going down eight,
  //   then going back up to the next column and going down eight,
  //   continuing until you reach the end of the row and then jumping to the first
  //   column nine pixels down, etc.
  for (int j=0; j<y; j+=8)
  {
    for (int i=0; i<x; i++)
    {
      // For each 8 pixel subset, create string and append 1 or 0 depending on pixel
      // The top pixel is the least significant bit (the one on the right)
      String s = "";
      for (int k=0; k<8; k++)
      {
        if (boxes[i][j+k].myColor == color(255))
          s = "0" + s;
        else
          s = "1" + s;
      }

      //convert binary string to int
      int num = unbinary(s);

      // Output number as hexidecimal
      output.print("0x");
      output.print(hex(num, 2));
      output.print(", ");
    }
  }

  // Print final stuff, flush the file, and close
  output.print("};");
  output.flush();
  output.close();
}

// Button class used for buttons
class Button
{
  public int x;
  public int y;
  public int wide;
  public int high;
  public int visible;
  public int radius;
  public int fontSize;
  public color myColor;
  public color textColor;
  public String label;

  public Button(int x, int y, int w, int h)
  {
    this(x, y, w, h, "");
  }

  public Button(int x, int y, int w, int h, String s)
  {
    this.x = x;
    this.y = y;
    this.wide = w;
    this.high = h;
    this.myColor = 255;
    this.textColor = 0;
    this.label = s;
    this.visible = 1;
    this.fontSize = 12;

    if (wide >= high)
      this.radius = high/4;
    else
      this.radius = wide/4;
  }

  public void draw()
  {
    fill(myColor);
    noStroke();
    rect(x, y+radius, wide, high-2*radius);
    rect(x+radius, y, wide-2*radius, high);
    ellipse(x+radius, y+radius, 2*radius, 2*radius);
    ellipse(x+radius, y+high-radius, 2*radius, 2*radius);
    ellipse(x+wide-radius, y+radius, 2*radius, 2*radius);
    ellipse(x+wide-radius, y+high-radius, 2*radius, 2*radius);
    fill(textColor);
    textAlign(CENTER, CENTER);
    textSize(fontSize);
    text(this.label, x+wide/2, y+high/2);
  }

  public boolean isClicked()
  {
    if (mouseX > x && mouseX < x+wide && mouseY > y && mouseY < y+high)
      return true;
    else
      return false;
  }
}

// Square class used for the pixels
class Square
{
  public int x;
  public int y;
  public int wide;
  public int high;
  public int myColor;
  public int strokeSize;

  public Square(int x, int y, int wide, int high)
  {
    this.x = x;
    this.y = y;
    this.wide = wide;
    this.high = high;
    this.myColor = color(0);
    this.strokeSize = 1;
  }

  public void draw()
  {
    stroke(0);
    strokeWeight(strokeSize);
    fill(myColor);
    rect(x, y, wide, high);
  }

  public boolean isClicked()
  {
    if (mouseX > x && mouseX < x+wide && mouseY > y && mouseY < y+high)
      return true;
    else
      return false;
  }

  public boolean isOn()
  {
    if (mouseX > x && mouseX < x+wide && mouseY > y && mouseY < y+high)
      return true;
    else
      return false;
  }
}
a


Hello,Thanks for the awesome post,but i seem to have a problem with loading the image i want.When I press ‘load image’ is shows an error saying file is inaccessible…so please tell me the name of the folder in which i should place my image.
Fixed it. Re-download and it should work. Just place your “image.jpg” file in the same folder as the sketch.
Found it…Thanks though.. 🙂
I can’t seem to save the resultant image as a bmp file.Nothing happens when i press the ‘save BMP’ key.Sorry for the comments,I’m trying this in real time. 🙂
There shouldn’t be any button animation to show that you clicked the button since it’s a very crude button. But it should put a file called “bmp.txt” inside the folder that you are running the program from. Check to see if it’s there and if not comment back and we will try some other things. 🙂
What a wonderful program! Thank you for makeing this. However i seem to have a problem getting the result working on my arduino . I have made the
“static unsigned char PROGMEM sillo[] = {0xFF…and so on” and used:
display.drawBitmap(0, 0, sillo, 84, 48, 1);
display.display();
I have some old bitmaps in HEX that works this way, but i would love to get the code from your program working.. Do you have any clues to what i have to change? Again, super cool program! 🙂
Same problem here… When I change the pcd8544_buffer, work fine, but if I try to print usind drawBitmap, doesnt work
Hi, this was just what I was looking for.
The problem I have is that when I press the “load image” button nothing happens at all. I have placed a .jpg called “image.jpg” in the sketch folder.
If you could help I would appreciate it a lot.
Edit the code or the file file to bman.jpg
The code is looking for this file
As Marsselo said, I had a typo in the original sketch. You can edit the line or just re-download the file above.
Hi guys
I struggled a lot with this and the bitmaps
I sometimes distorts or do not work, I used some applications and methods, what I am doing and I recommend is that you make your own logos like? if they can not schedule There will be a sheet in Excel, draw the reticle 48×84 and go placing one’s bit on, 0’s bit off, then do the formulas for each 8-bit field of MSB to LSB The formula will be associating BIN boxes. A. HEX (A7 && && A6 A8 … A1) to return them to the character map, I hope they work is a faster way to get the character map. Hopefully this application do otherwise (to compose images) that is, if I have a map of characters but the displayed image is distorted we could compose doing the reverse, ie, load the file containing the character map and on that basis automaticamenta draw the image, then the mouse can fix these distortions and automatically update the new characters and the bitmap display it again, that would be great! so we do not start from zero again.
Anyway thank the attempt to provide various tools and compare that works for us and what not.
Thanks for posting this. What a great processing sketch. It was exactly what I needed to put logos on the lcd display. Having a lot of fun with it.
Well done.