

In this installment of Photo Edits I show how I retouched a photo from Sydney to go from ordinary to extraordinary. This was a fun one since I just switched to Lightroom and am working with a whole new workflow.
So, lets start with the before photo: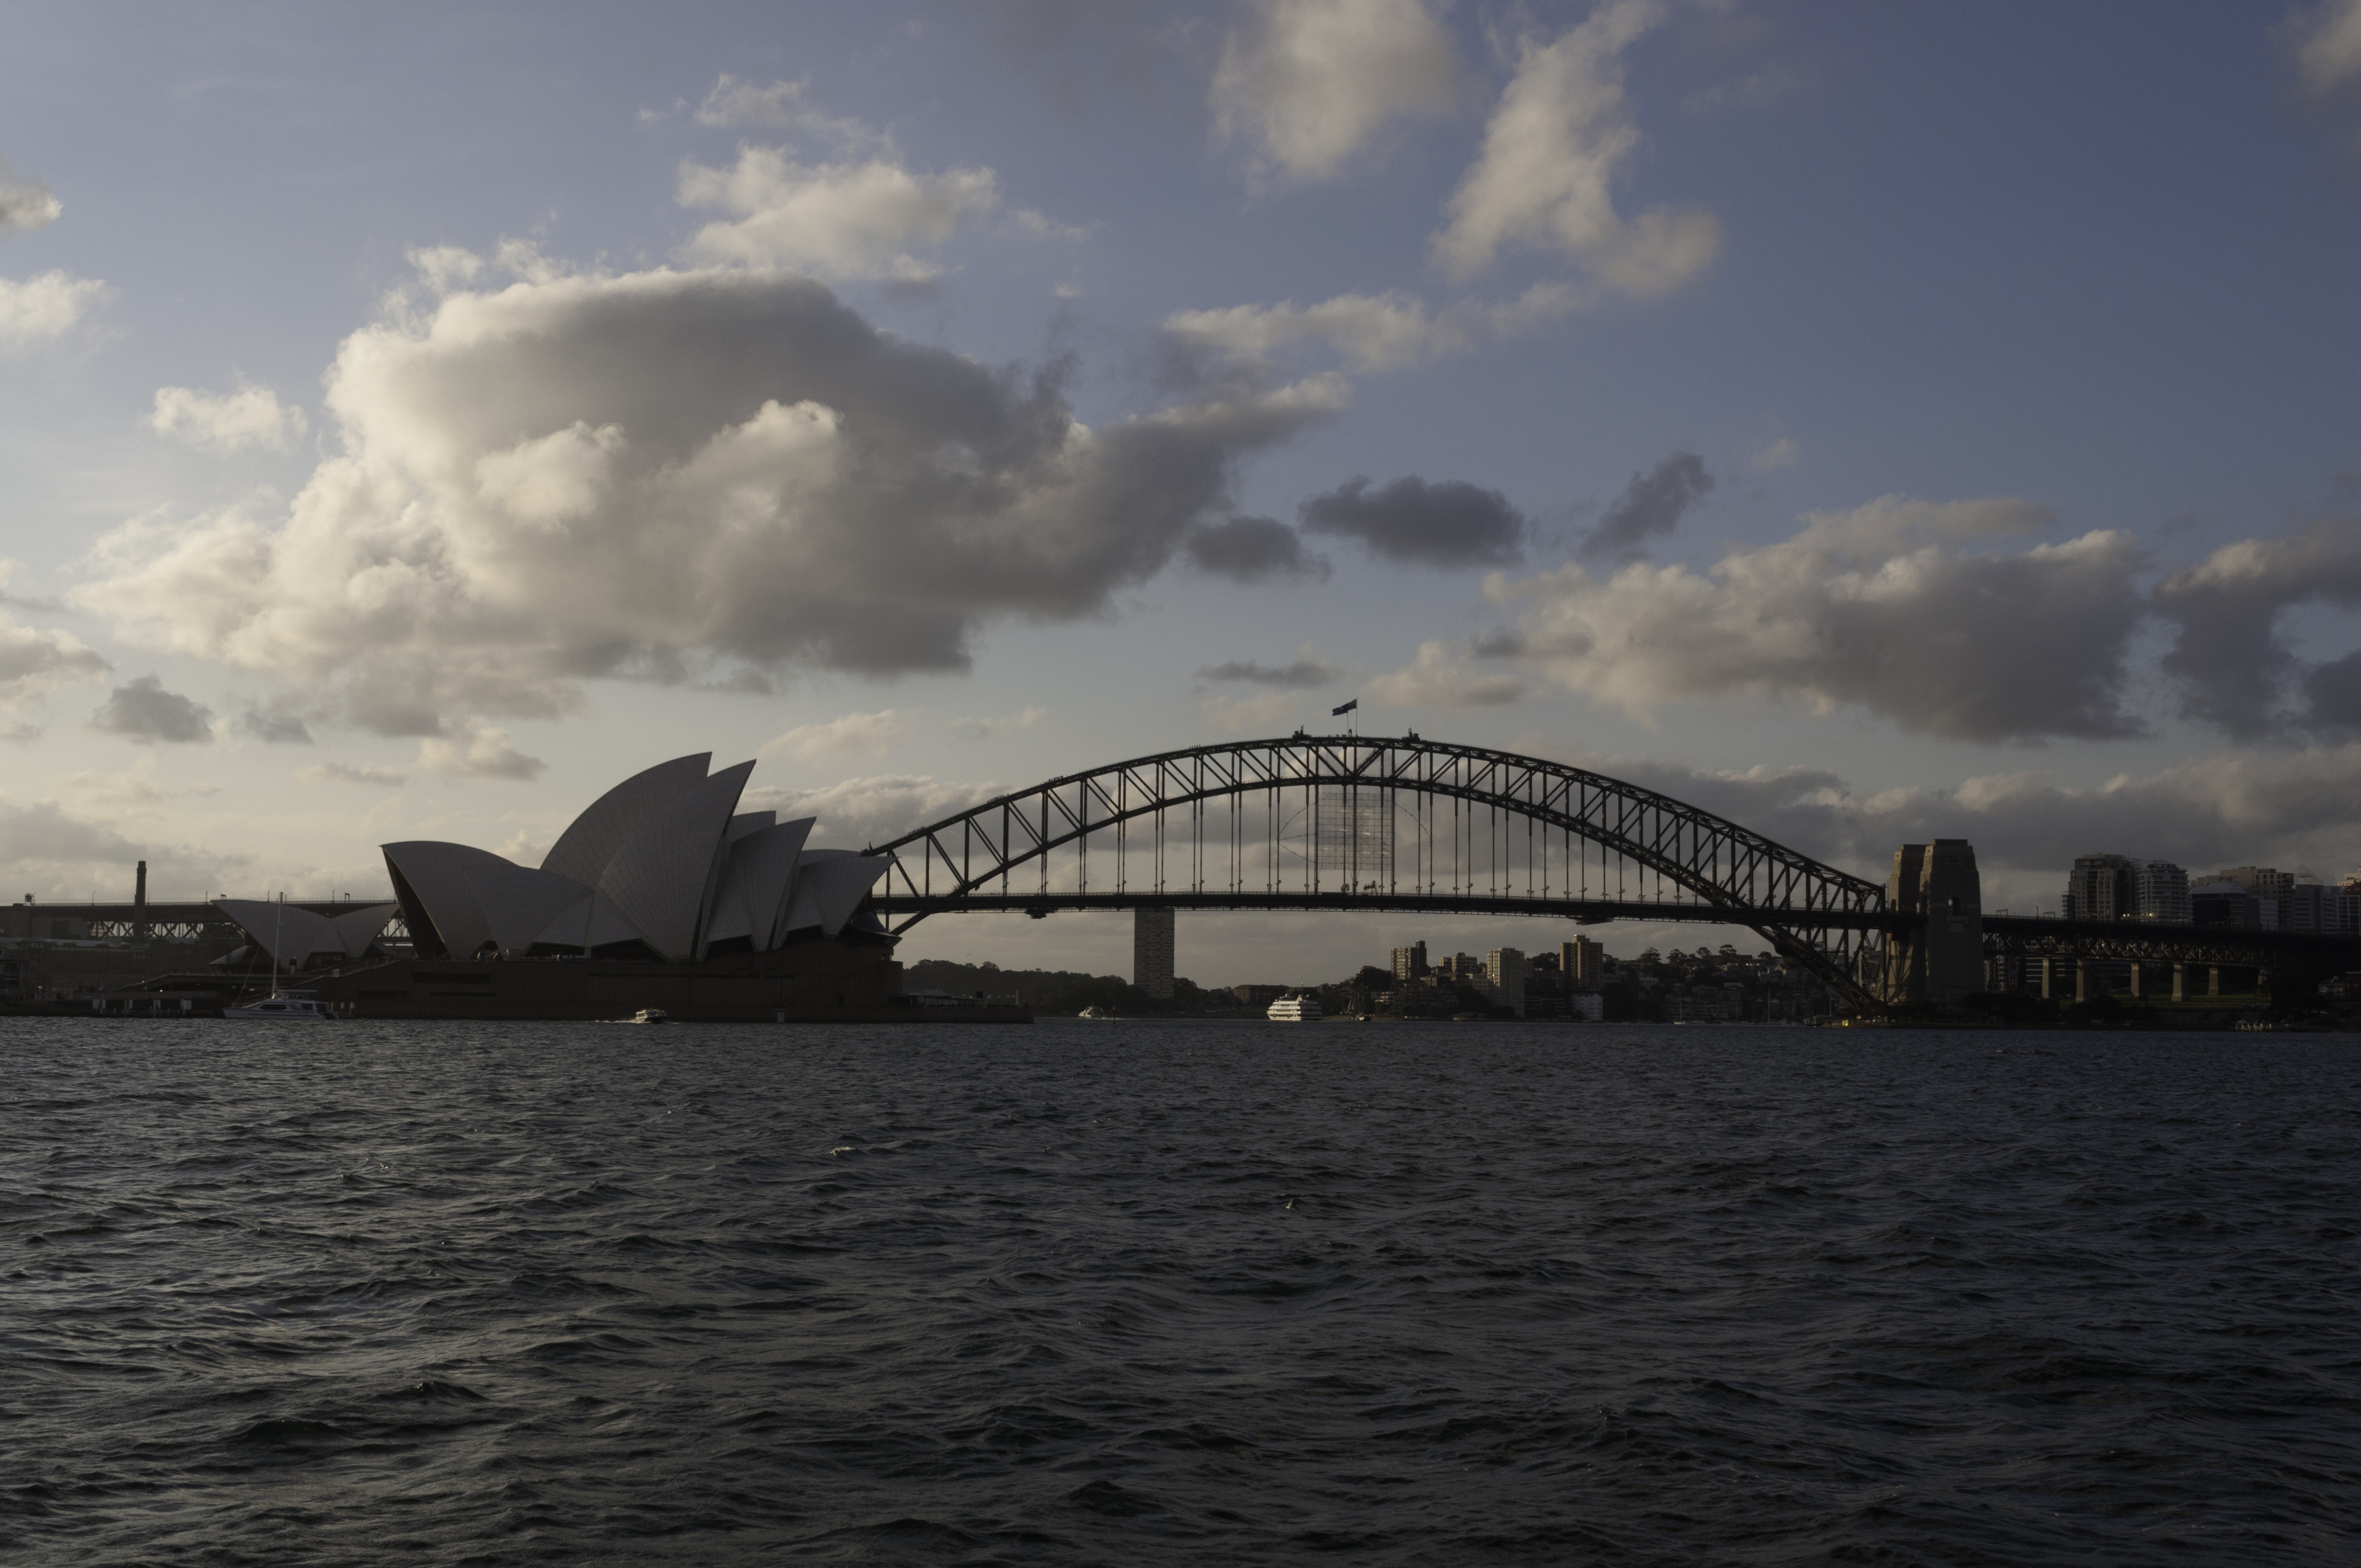
The first thing I always do in my shots is crop and straighten. It doesn’t make sense to go through a lot of work editing part of a photo that will get cut out. And if the composition doesn’t work it probably isn’t worth editing anyway. The cool part of this image was the clouds and obviously the opera house so I tool out the parts of sky without clouds and some water and positioned it so that one of the 1/3 points was where the opera house meets the bridge.

Next, I turned on the lens correction to fix the small distortion. Then, I used a workflow I got from Serge Ramelli, but I tone things down a little bit for a more natural look. I bump the shadows up to 80 and the highlights to -80. Then I increase the whites and decrease the blacks until you get to the point where you are about to clip. This is pretty close to just using the contrast adjustment but gives you a little more control. Then I added a little vibrance to punch up the color and went to work on the white balance. I made it a little warmer to mimic what I remember and added just a touch of magenta (Serge is rubbing off on me).

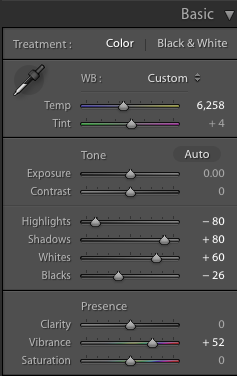
At this point, the picture still felt like it was missing a little something so I went to the HSL pane and increased the saturation of just the oranges. Then I went to the effects pane and added a very slight vignette. It’s probably light enough that you wouldn’t know it was there if I didn’t point it out but it does pull your eye into the picture just a bit. Finally, I went into the detail panel to reduce the noise and add sharpening. I put the luminance noise reduction at 30, which is just above normal since I was moving and the using ISO 400. Sharpening is something ever RAW file needs and I put this at 80, which is about normal for me.


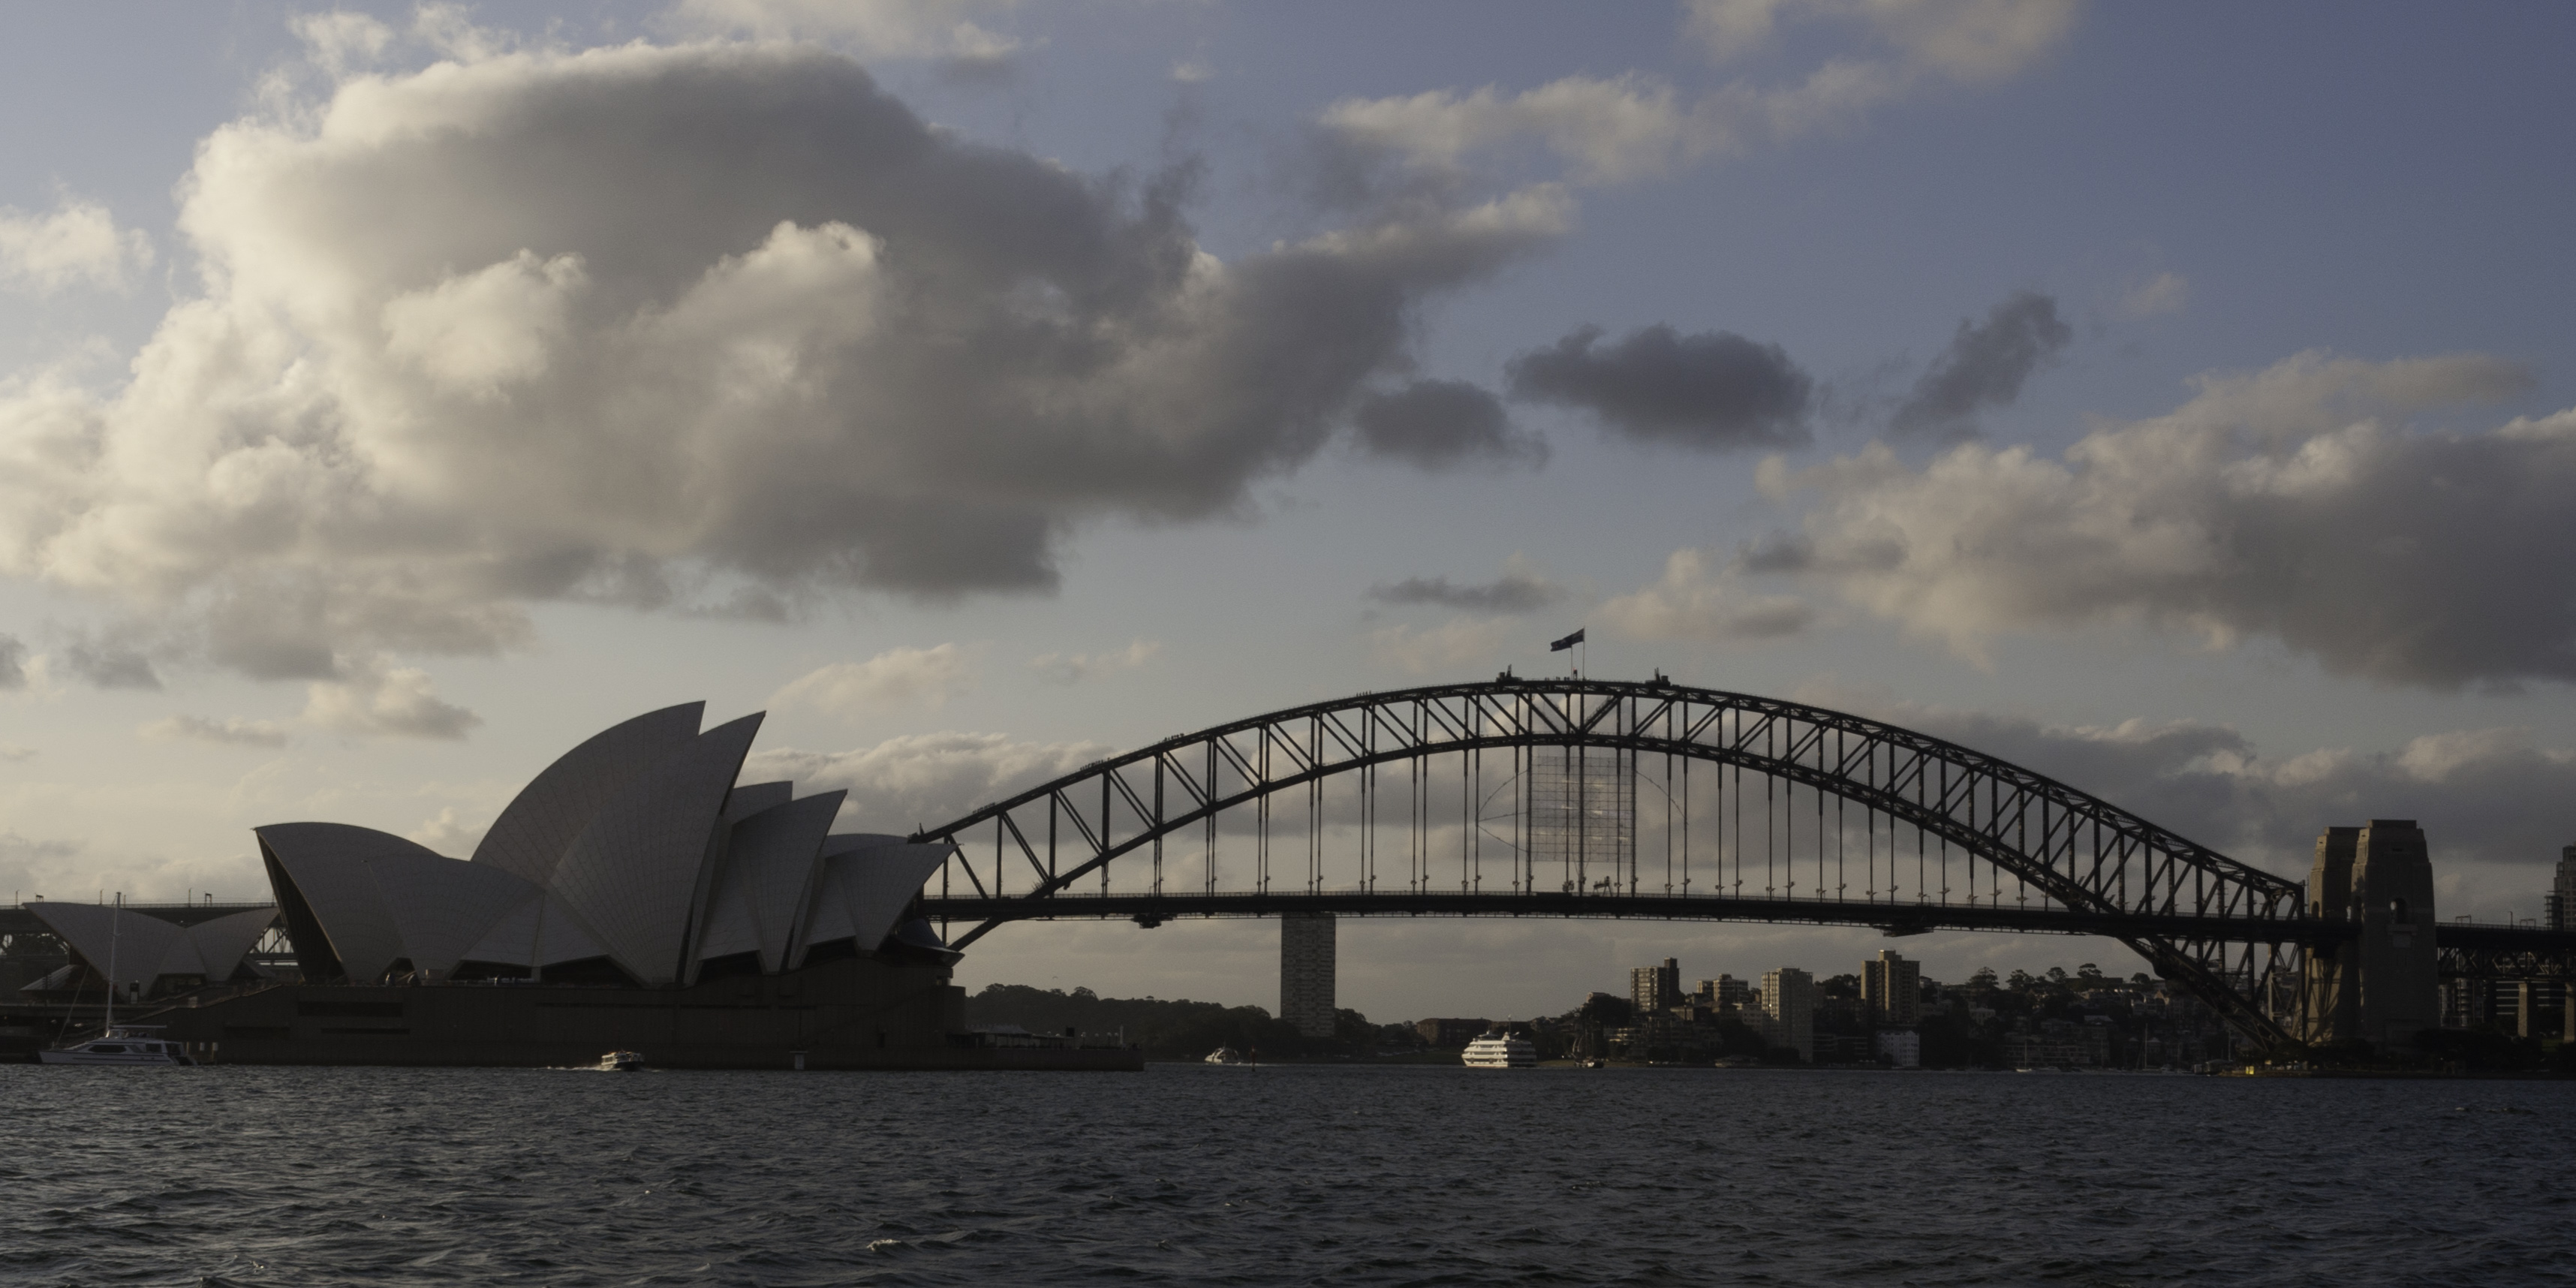
And after all of that, we end up with the before and after:

So what do you think? Did I really improve this photo or should I just go back to my day job? I’d love to know what you think or what you would have done in the comments.
